Whether it's to give us a break from the rapid pace of modern life, pop in to grab a quick coffee on the go or catch up over a leisurely lunch with friends, coffee shops are now a day-to-day part of our lives.
Coffee itself has always played a vital role in the morning routines of many people, but with the growth in popularity of different kinds of coffee, more of us are exploring its limitless potential. With a huge variety of coffee available, customers are now more aware than ever of what makes a good cup, from the ingredients used to the skills of the barista behind the counter. This is why, at Esquires, we take so much pride in our ingredients, as well as the training we provide to our excellent staff.
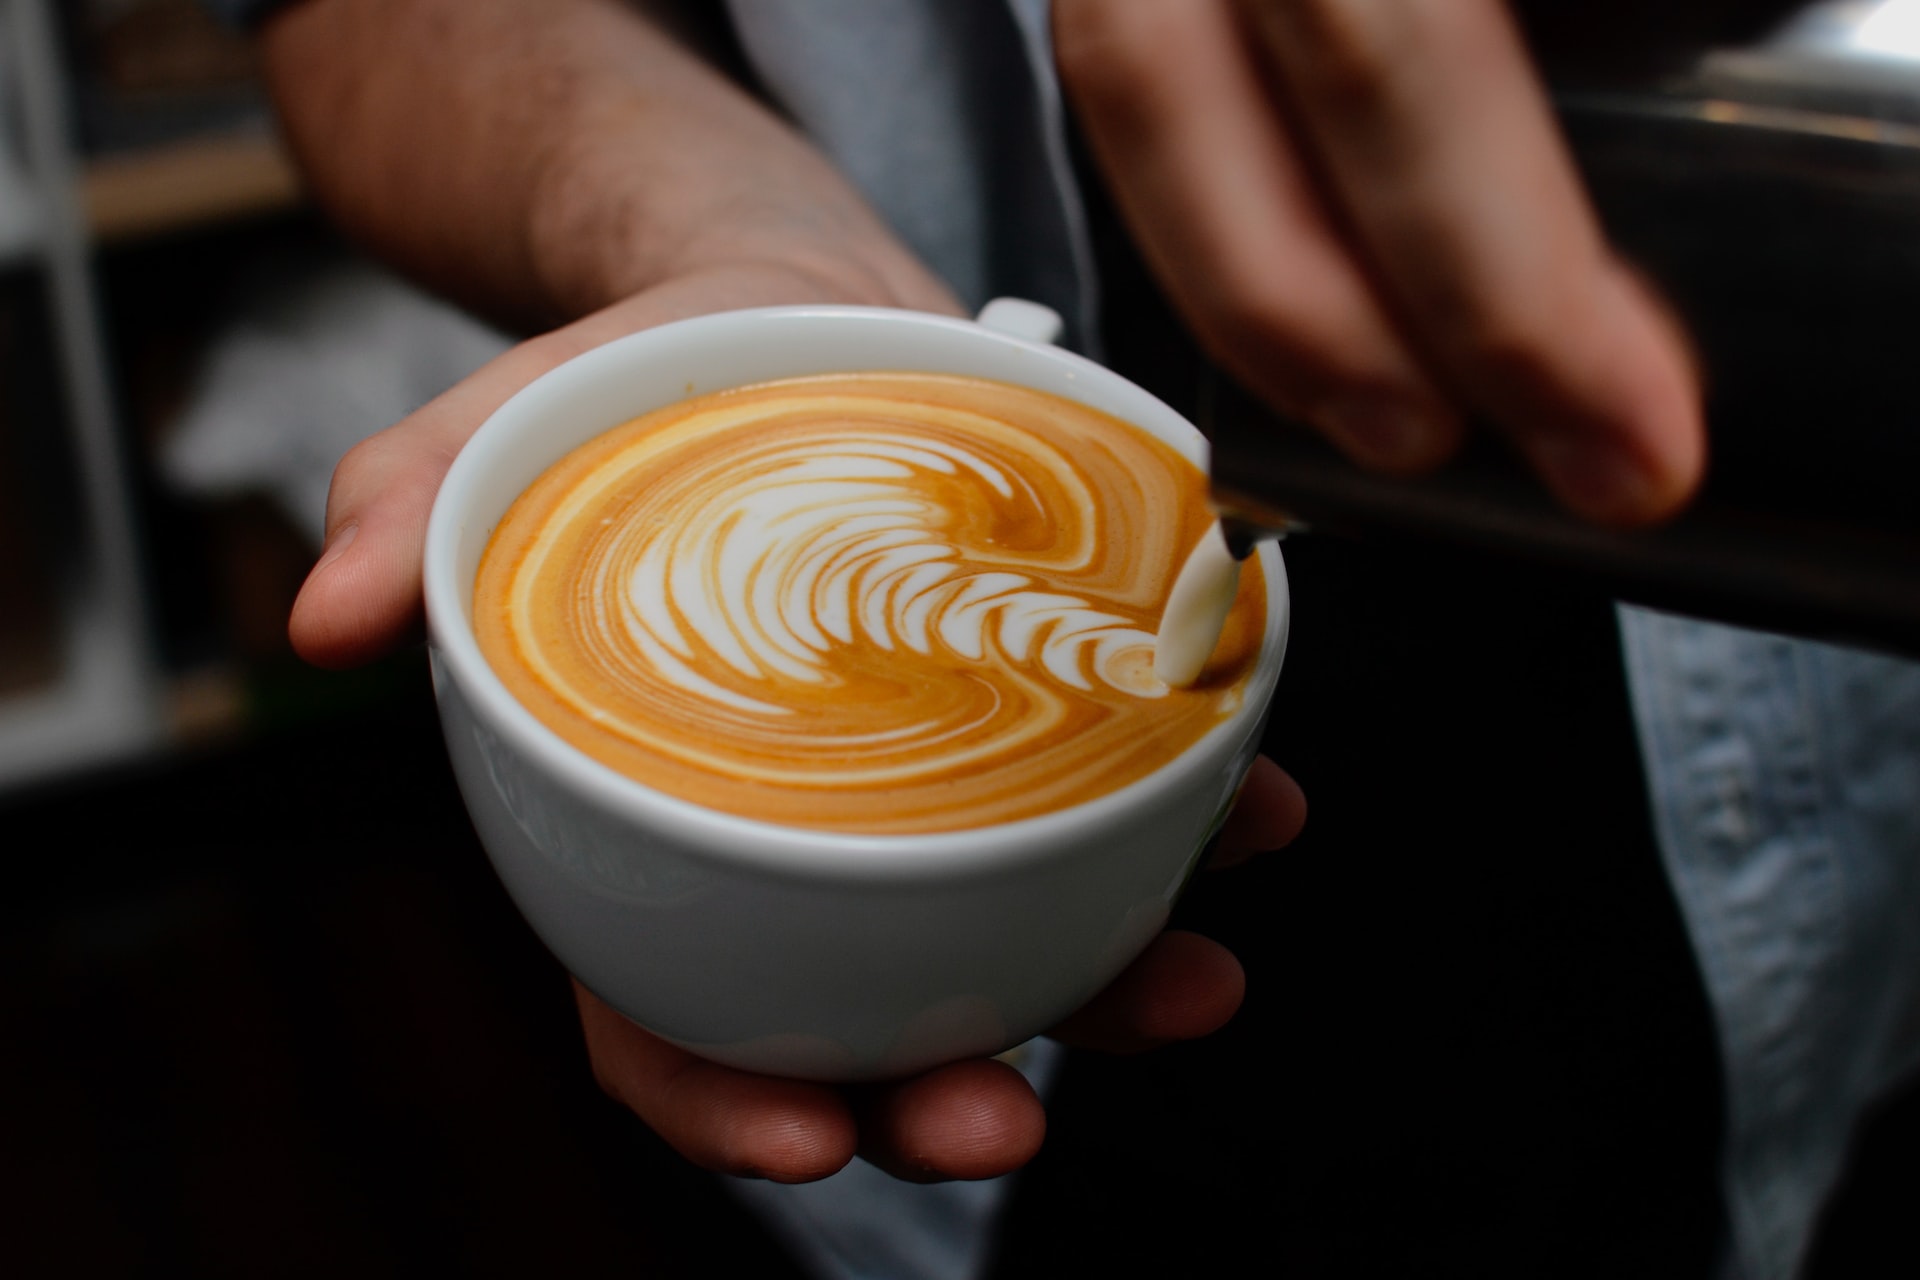
There are countless possibilities when it comes to latte art. The art form allows baristas to showcase their creativity and skills by creating intricate designs and patterns on the surface of a latte using steamed milk. Some of the most common latte art designs include heart, tulip, rosetta and swan. However, the potential for latte art is virtually limitless and skilled baristas can create a wide range of unique and personalised designs, such as animals, landscapes, and even portraits. With practice and imagination, baristas continue to push the boundaries of latte art, constantly discovering and creating new designs.
The World of Latte Art
Lattes are particularly popular, and the technical excellence of baristas has led to the growing popularity of what is known as latte art. Now a frequent sight in any established coffee shop, latte art adds a twist of creativity to each latte, showing the craft of the barista alongside serving a great-tasting cup.
Here, we take a look through some of the basics of latte art and how you can bring this to your own coffee shop.

How Does Latte Art Work?
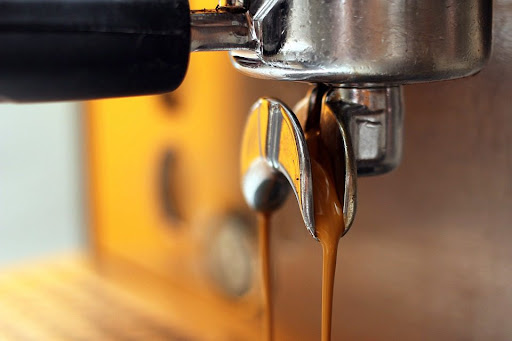
The reason why lattes can be used as a canvas for such creative artworks comes down to its technical components. Therefore, to learn how latte art is made, we need to understand how a latte is created.
How to Make a Latte
Less commonly referred to as a cafe latte, the term 'latte' refers to the steamed milk which goes into making this coffee. A latte is made with espresso, to which steamed milk is added. This differs from a latte macchiato, in which espresso is added to steamed milk. It also differs from the popular cappuccino, which includes equal parts steamed and foamed milk.
To find out more about the ins and outs of various ways you can make coffee, check out our guide to types of coffee drinks.
It is the unique qualities of steamed milk which makes latte art possible. Simply pouring milk into coffee causes the two to blend, but in a latte, when the components have been separated through the steaming process, it is possible for the milk to remain distinct.
How To Do Latte Art
Because the creation of a quality latte is reliant on skill and timing, creating art on top of it requires an incredible level of focus and experience. Temperatures, speeds and angles all go into making latte art that not only looks good but also works in harmony with the excellent taste of the drink.
The most important aspect of creating latte art is, of course, the milk. To produce the perfect steamed milk, the liquid must be chilled then rapidly heated while being steamed. This alters the makeup of the milk, creating the velvety sweetness that the latte is renowned for. It is also important to not allow the steaming to go too far, as too many large bubbles at this stage can affect the ability to create latte art and the quality of the drink.
Once the perfect steamed milk has been created, you must quickly begin to pour it into the espresso shots. It is crucial that you don't pour too slowly, as the foam will become trapped in the jug. Start from a medium height until the cup is about half full, allowing the latte to form before you think about creating your design. Once you reach this stage, pour the steamed milk from close to the cup. This stops the milk from going deep into the drink, and you will begin to see it appear at the top.
Baristas move the jug of steamed milk as they are finishing the pour to produce specific designs, and the type of movement depends on the image they are looking to create. For example, a leaf pattern occurs when the jug is moved from side-to-side while moving to the bottom of the cup, before a final move through the latte to finish. The dense nature of the drink also allows other ingredients to be added on top for impact, such as cocoa powder or syrups.

How To Pour A Latte Heart
A heart shape is where most baristas start their latte art journey, due to it being the easiest pattern to create. That said there are some tips and tricks that you will need to know in order to create the perfect latte art heart.
Place the cup of espresso in your hand and tilt it away from you. Start by pouring the milk from a slight height to the middle of the cup. This will allow the milk to sink underneath the espresso, resulting in a better contrast for your latte art. Keep pouring until the cup is 50% full.
Once the cup is 50% full, you want to pour the milk from as close to the surface of the drink as possible. Keep pouring to the middle of the cup in one spot, this will keep the heart symmetrical.
Pouring into the middle will also make the milk start to form a 'ball'. The longer and faster you continue to pour in the middle to one spot the bigger the 'ball' will become. Once the cup starts to look full, it's time to pour through the 'ball' to create the heart shape.
To draw through the 'ball' all you need to do is pour steadily through it. Don't pour too slow or fast. Pouring too fast can cause your heart to look more like bunny ears and pouring too slowly won't divide the 'ball'.
Once drawn through you will have the perfect heart latte art and a great cup of coffee!
How To Pour A Latte Rosetta
Creating a rosetta in a latte is arguably the hardest pattern to master.
Like when creating a heart, place the cup of espresso in your hand and tilt it away from you. Start pouring the milk into the middle of the cup from a slight height. Once the cup is 50% full, pour the milk closer to the surface of the drink.
To create the rosetta pattern keep pouring into the middle of the cup even though the pattern will move to the bottom of the cup. By pouring the milk in 'fast' the pattern will spread and move to the bottom.
Once you start to notice the milk showing on the surface of the drink, start wiggling the pitcher from side to side and keep pouring fast to the middle. The wiggle motion will create a wave, later turning into the rosetta pattern. Continue to wiggle the pitcher all the way to the end.
When you notice that there is a big enough base for your rosetta (the bottom part of the pattern), start to wiggle the pitcher back until you almost reach the edge of the cup. Once you are near the edge of the cup, stop wiggling the pitcher and pour on the spot for a second. This will create a heart at the top of the rosetta and also 'stiffen' the pattern to keep it in place.
Now it's time to divide and finish the pattern. Lift the pitcher 1-2 centimetres from the surface of the drink and start pouring through the rosetta. Pouring too high can cause the pattern to sink and pouring too slow can cause the divide to be poor.
Once you have drawn through the pattern, you have the perfect rosetta latte art!

Here at Esquires Coffee, all our baristas are trained to the highest level, whilst our finest Fairtrade and organically sourced ingredients mean that we can serve our customers with the best possible drinks. If you would love to learn how to make latte art whilst running your very own store, then discover the coffee franchise opportunities available at Esquires Coffee today!